Blog over HTTPS
Table of Contents
Blog over HTTPS
In preparation for the AWS Certified Developer - Associate exam, I decided to review as many services as possible. In this short article I will mainly talk about web hosting without covering aspects like Computing or Databases.
What we want to achieve?
I want to upload a blog online, but only pay for hosting when it is actually used and read by people. Normally, I would have considered any VPS from Aruba or DigitalOcean given the low prices.
Another alternative are the free sites hosted by github, the GitHub Pages, but they don’t allow you to have a custom domain.
Upload on S3
For those who come from a background where they always used VPS as online space, the most immediate choice could be to take an EC2 instance. This is not the optimal choice though, as there are other alternatives for what we want to achieve.
You can in fact use the S3 storage service. Why this? S3, in addition to storing our files online, also gives the possibility to serve them as static files thus allowing web hosting.
To start, you need to enter the S3 service and proceed with the creation of a bucket. The bucket in this context can be seen as a folder on which we are going to upload our content.
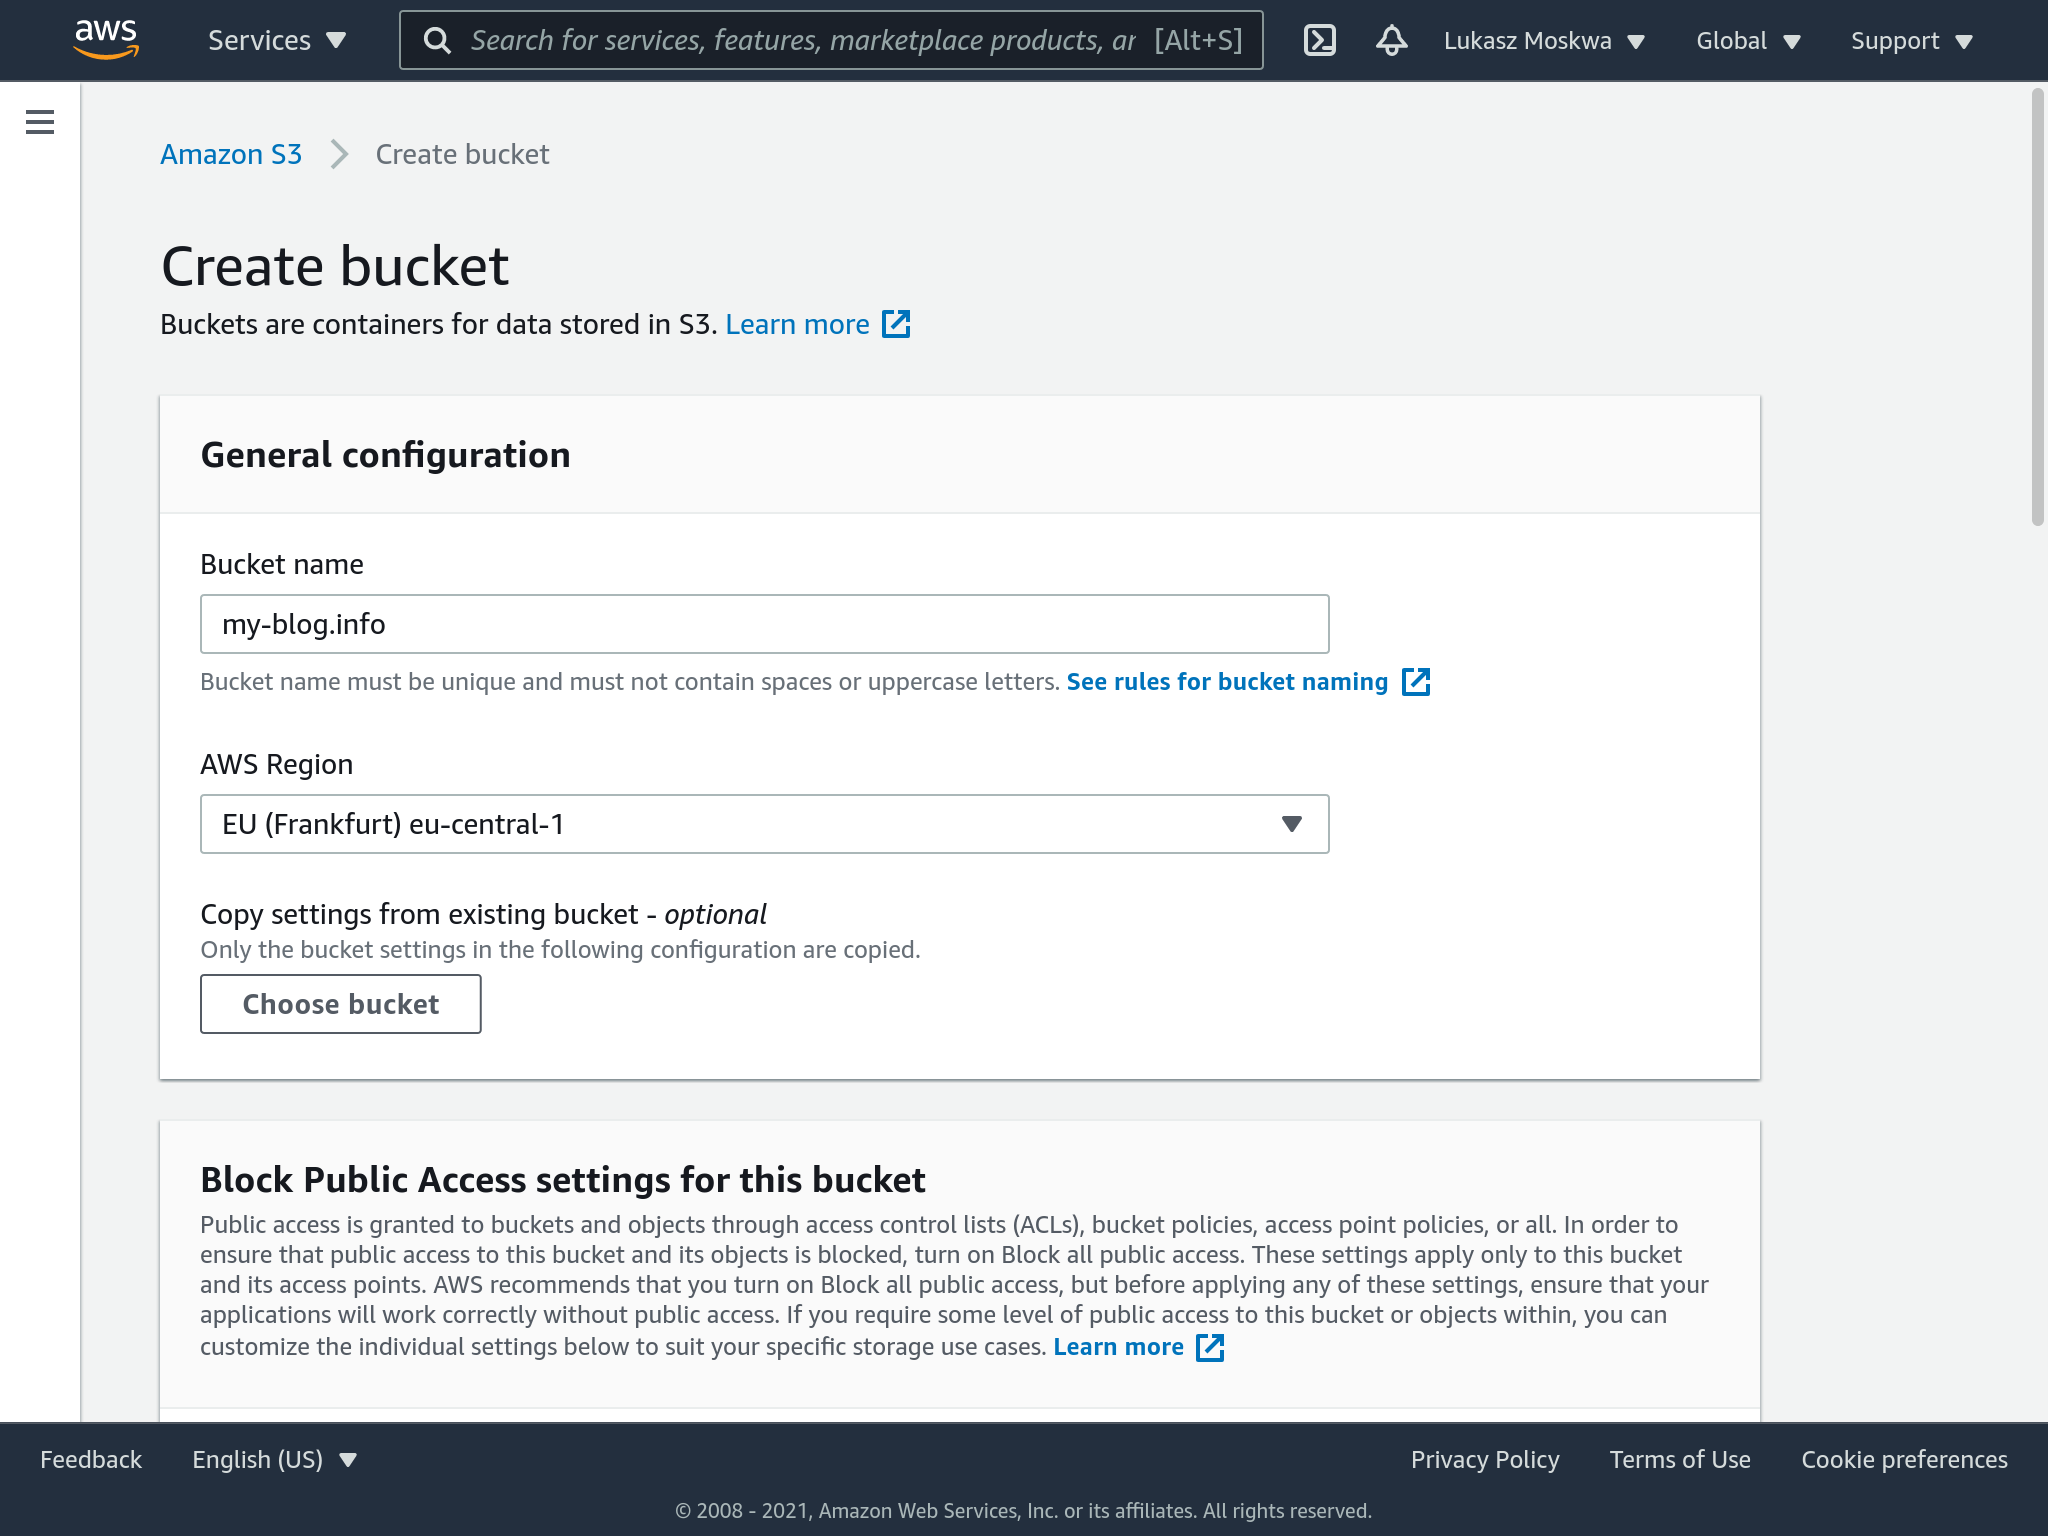
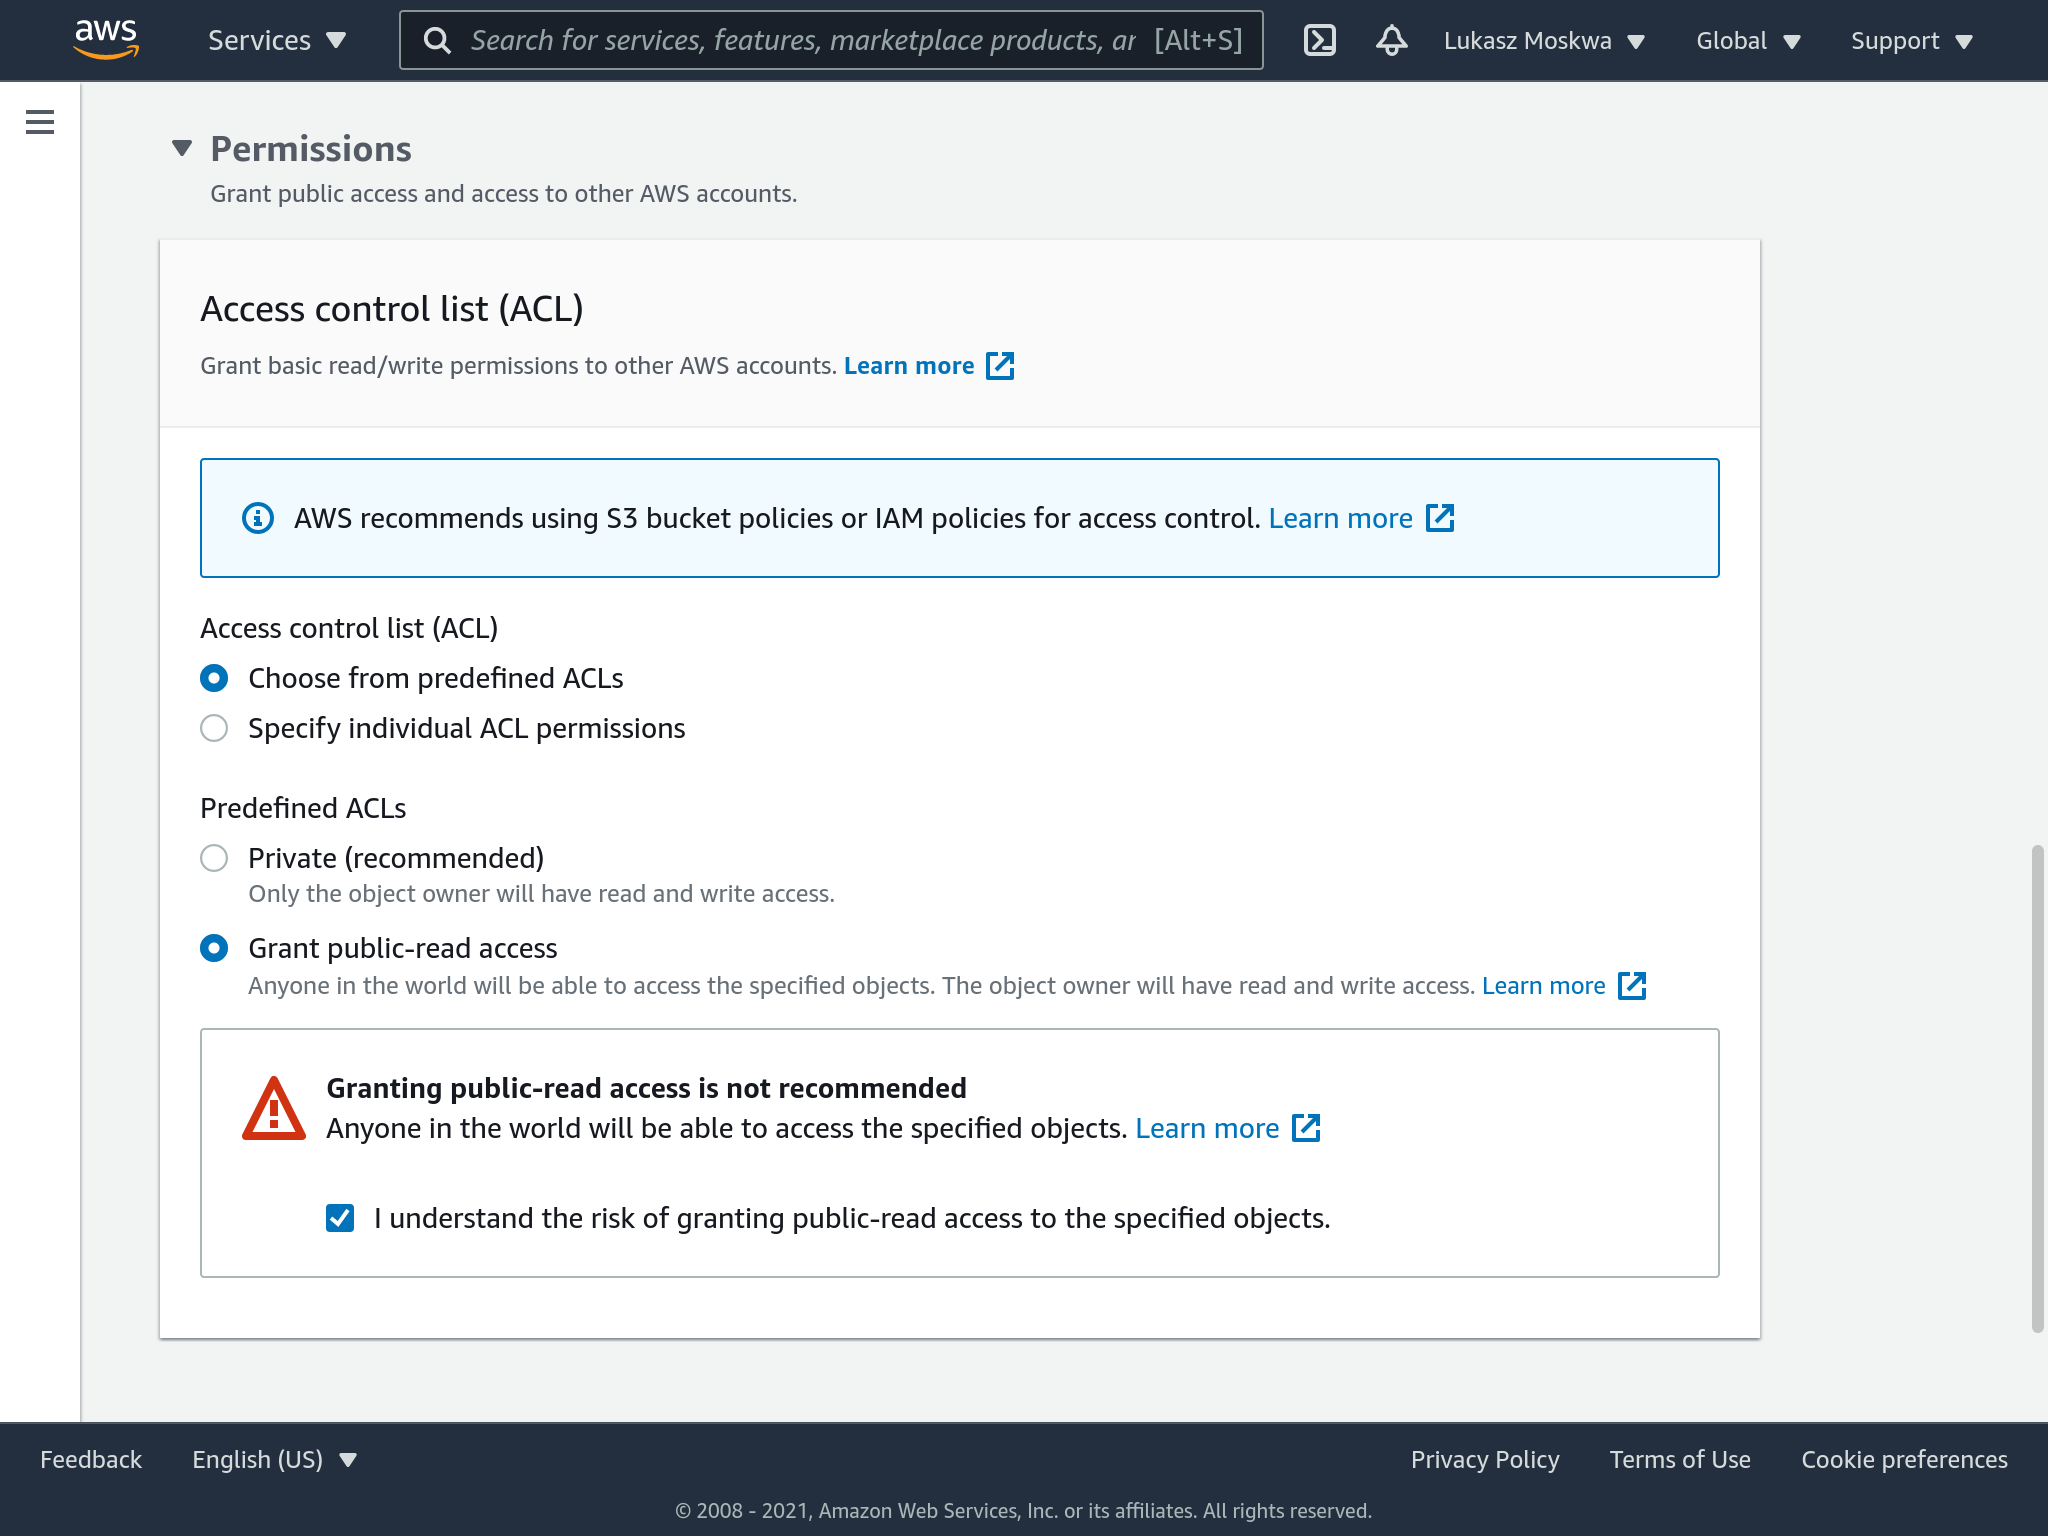
Among the settings, we have to remember to mark that the files we are going to upload on the bucket as public, therefore they can be seen by everybody.
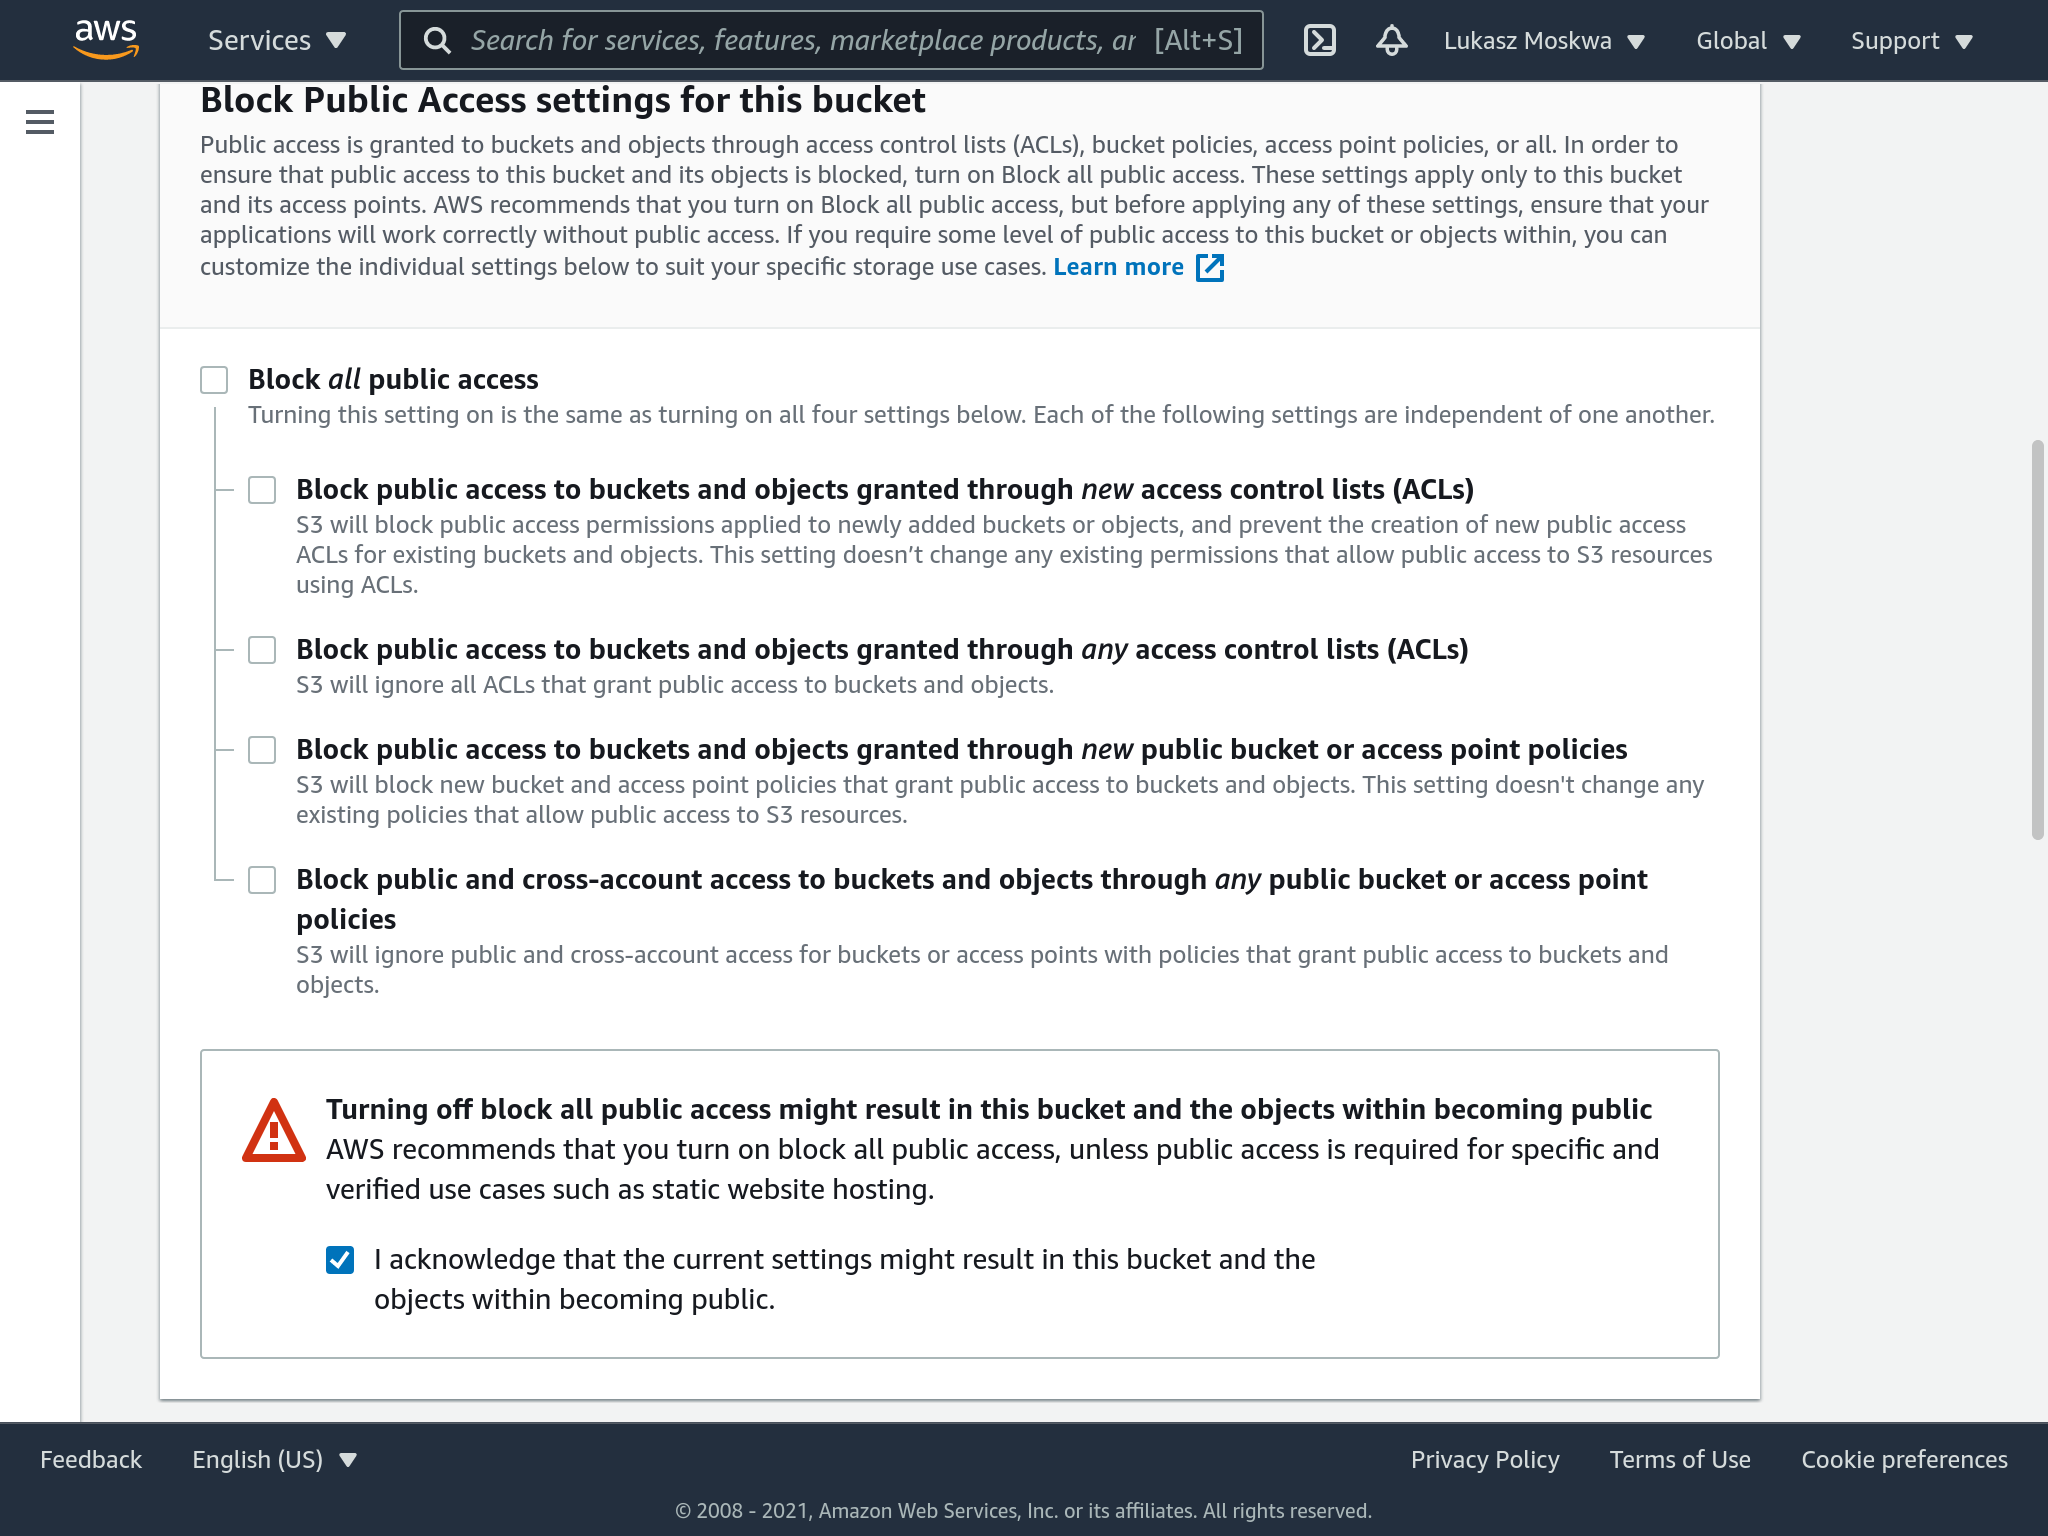
At this point, we drag our files inside the bucket to start loading. We will be asked for other configurations for the files we are uploading. Also here you must check the flag to make all the files public.
The last step left is enabling static web hosting on our bucket. This is done from the bucket settings.
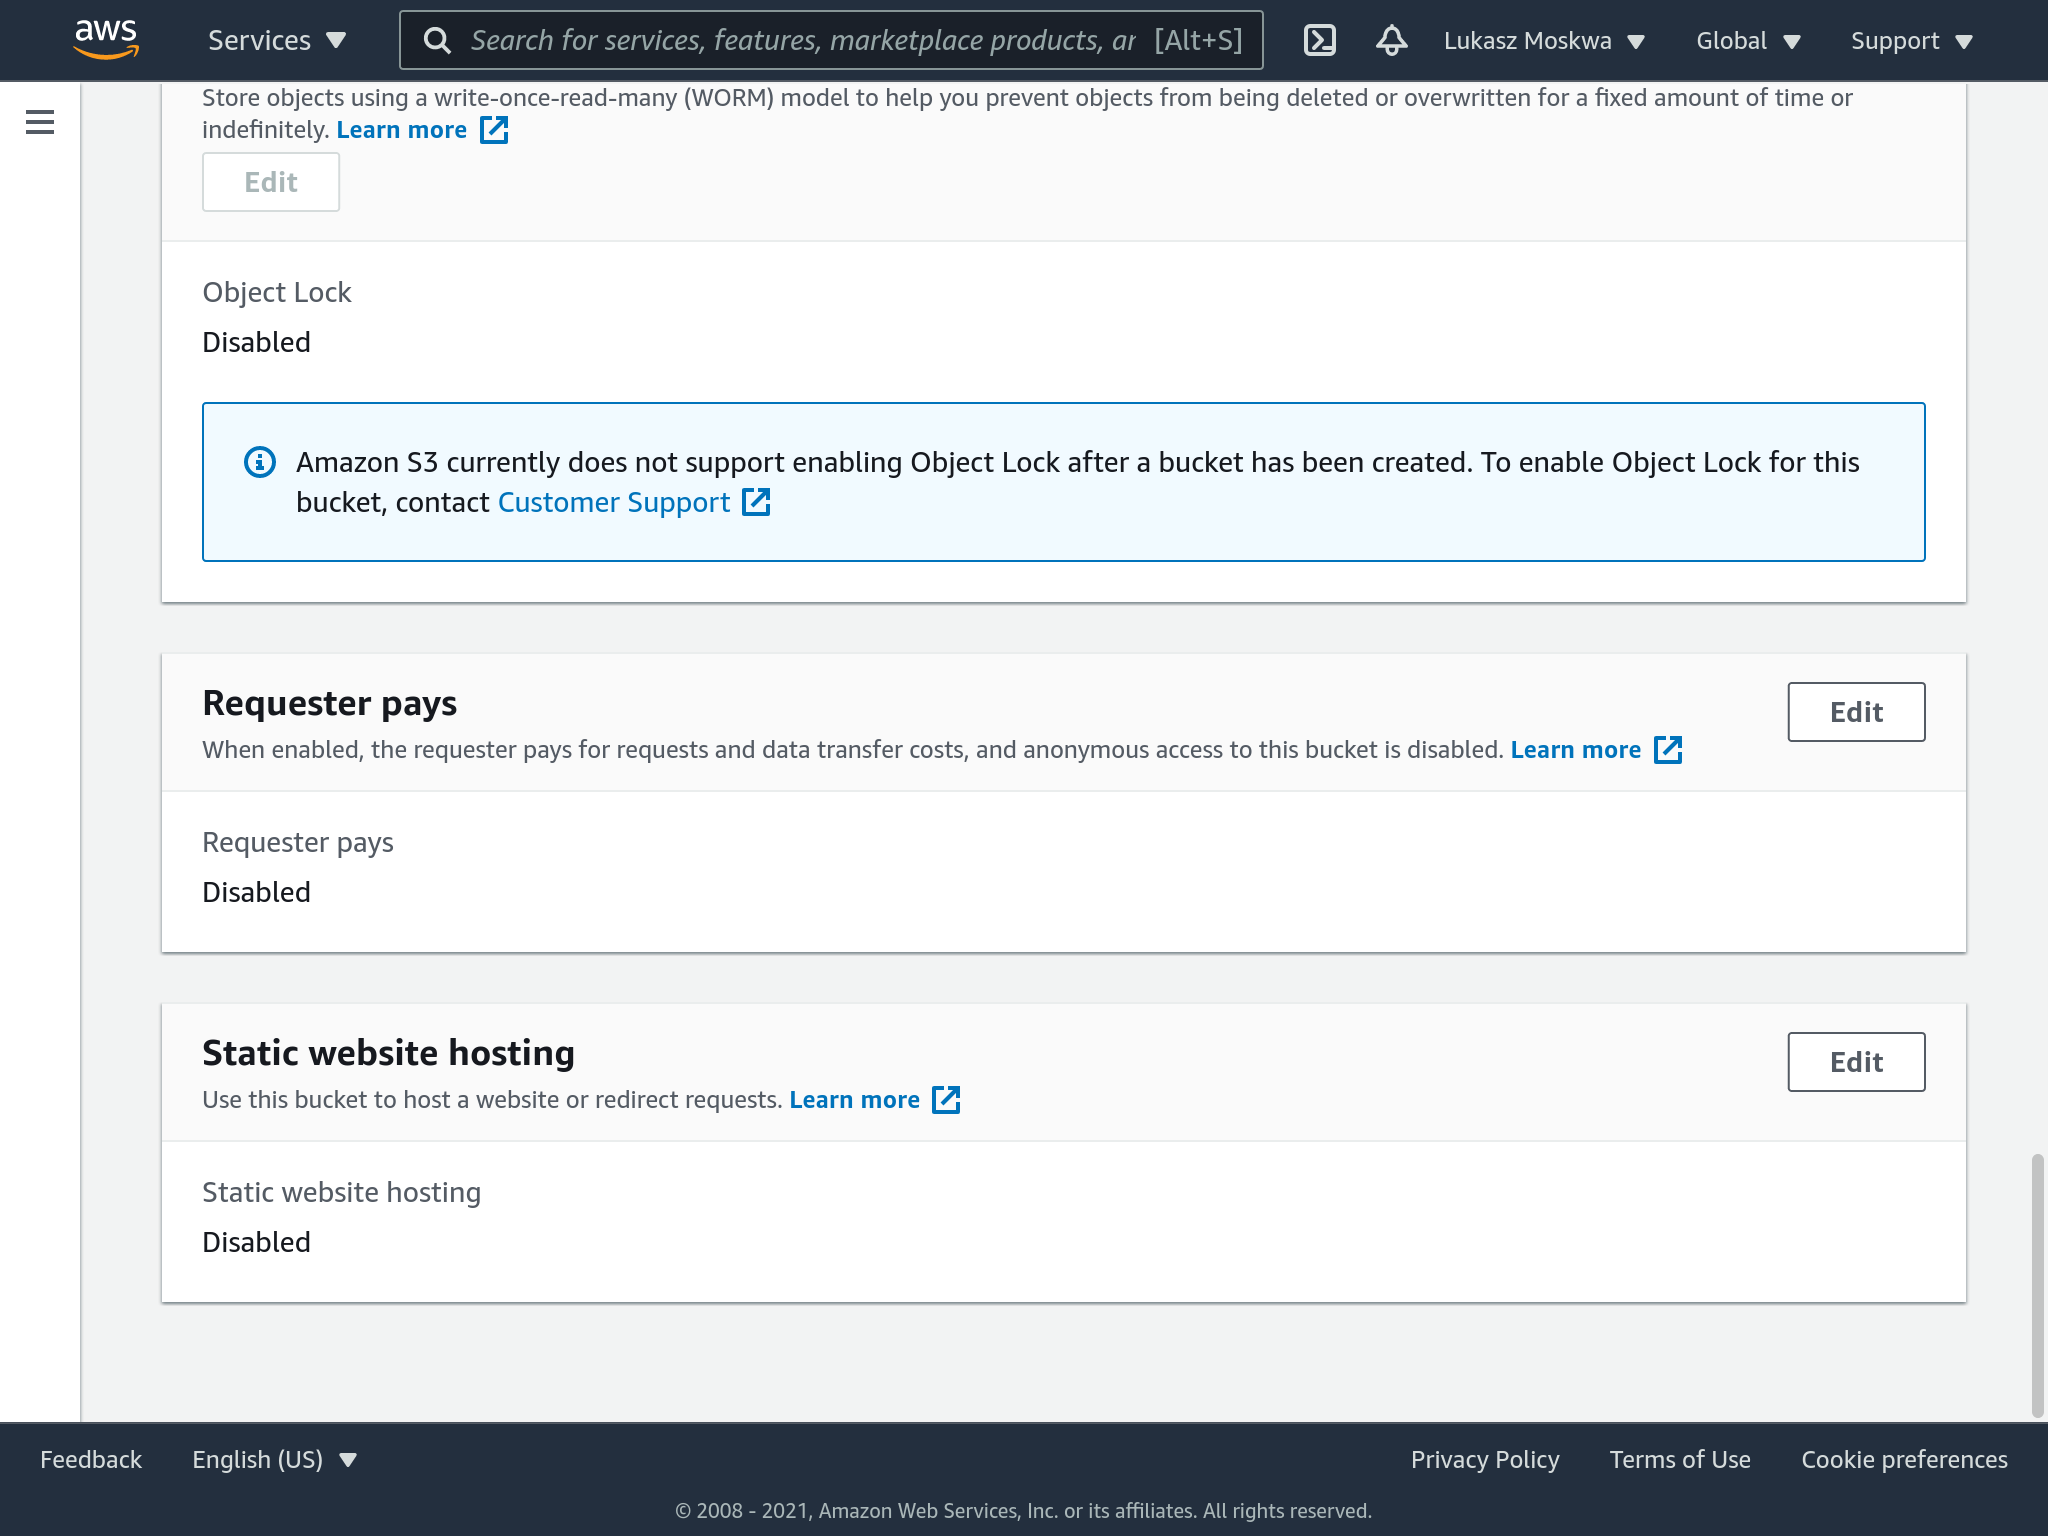
Our bucket is online! Now we can see all our files using the link we see in the bucket properties.
Redirect with Route 53
If you want to create a custom domain, you must first register this domain with a Registrar. Coincidentally, AWS has that as well. Through Route 53 you can in fact create your own custom domains by purchasing them for a year or more. In case you want to use another service than aws, you have to refer to its guides.
Once you’ve purchased your domain you’ll need some time before it’s approved and actually starts working.
Once we receive the confirmation email, we will see a similar screen inside our route53 page.
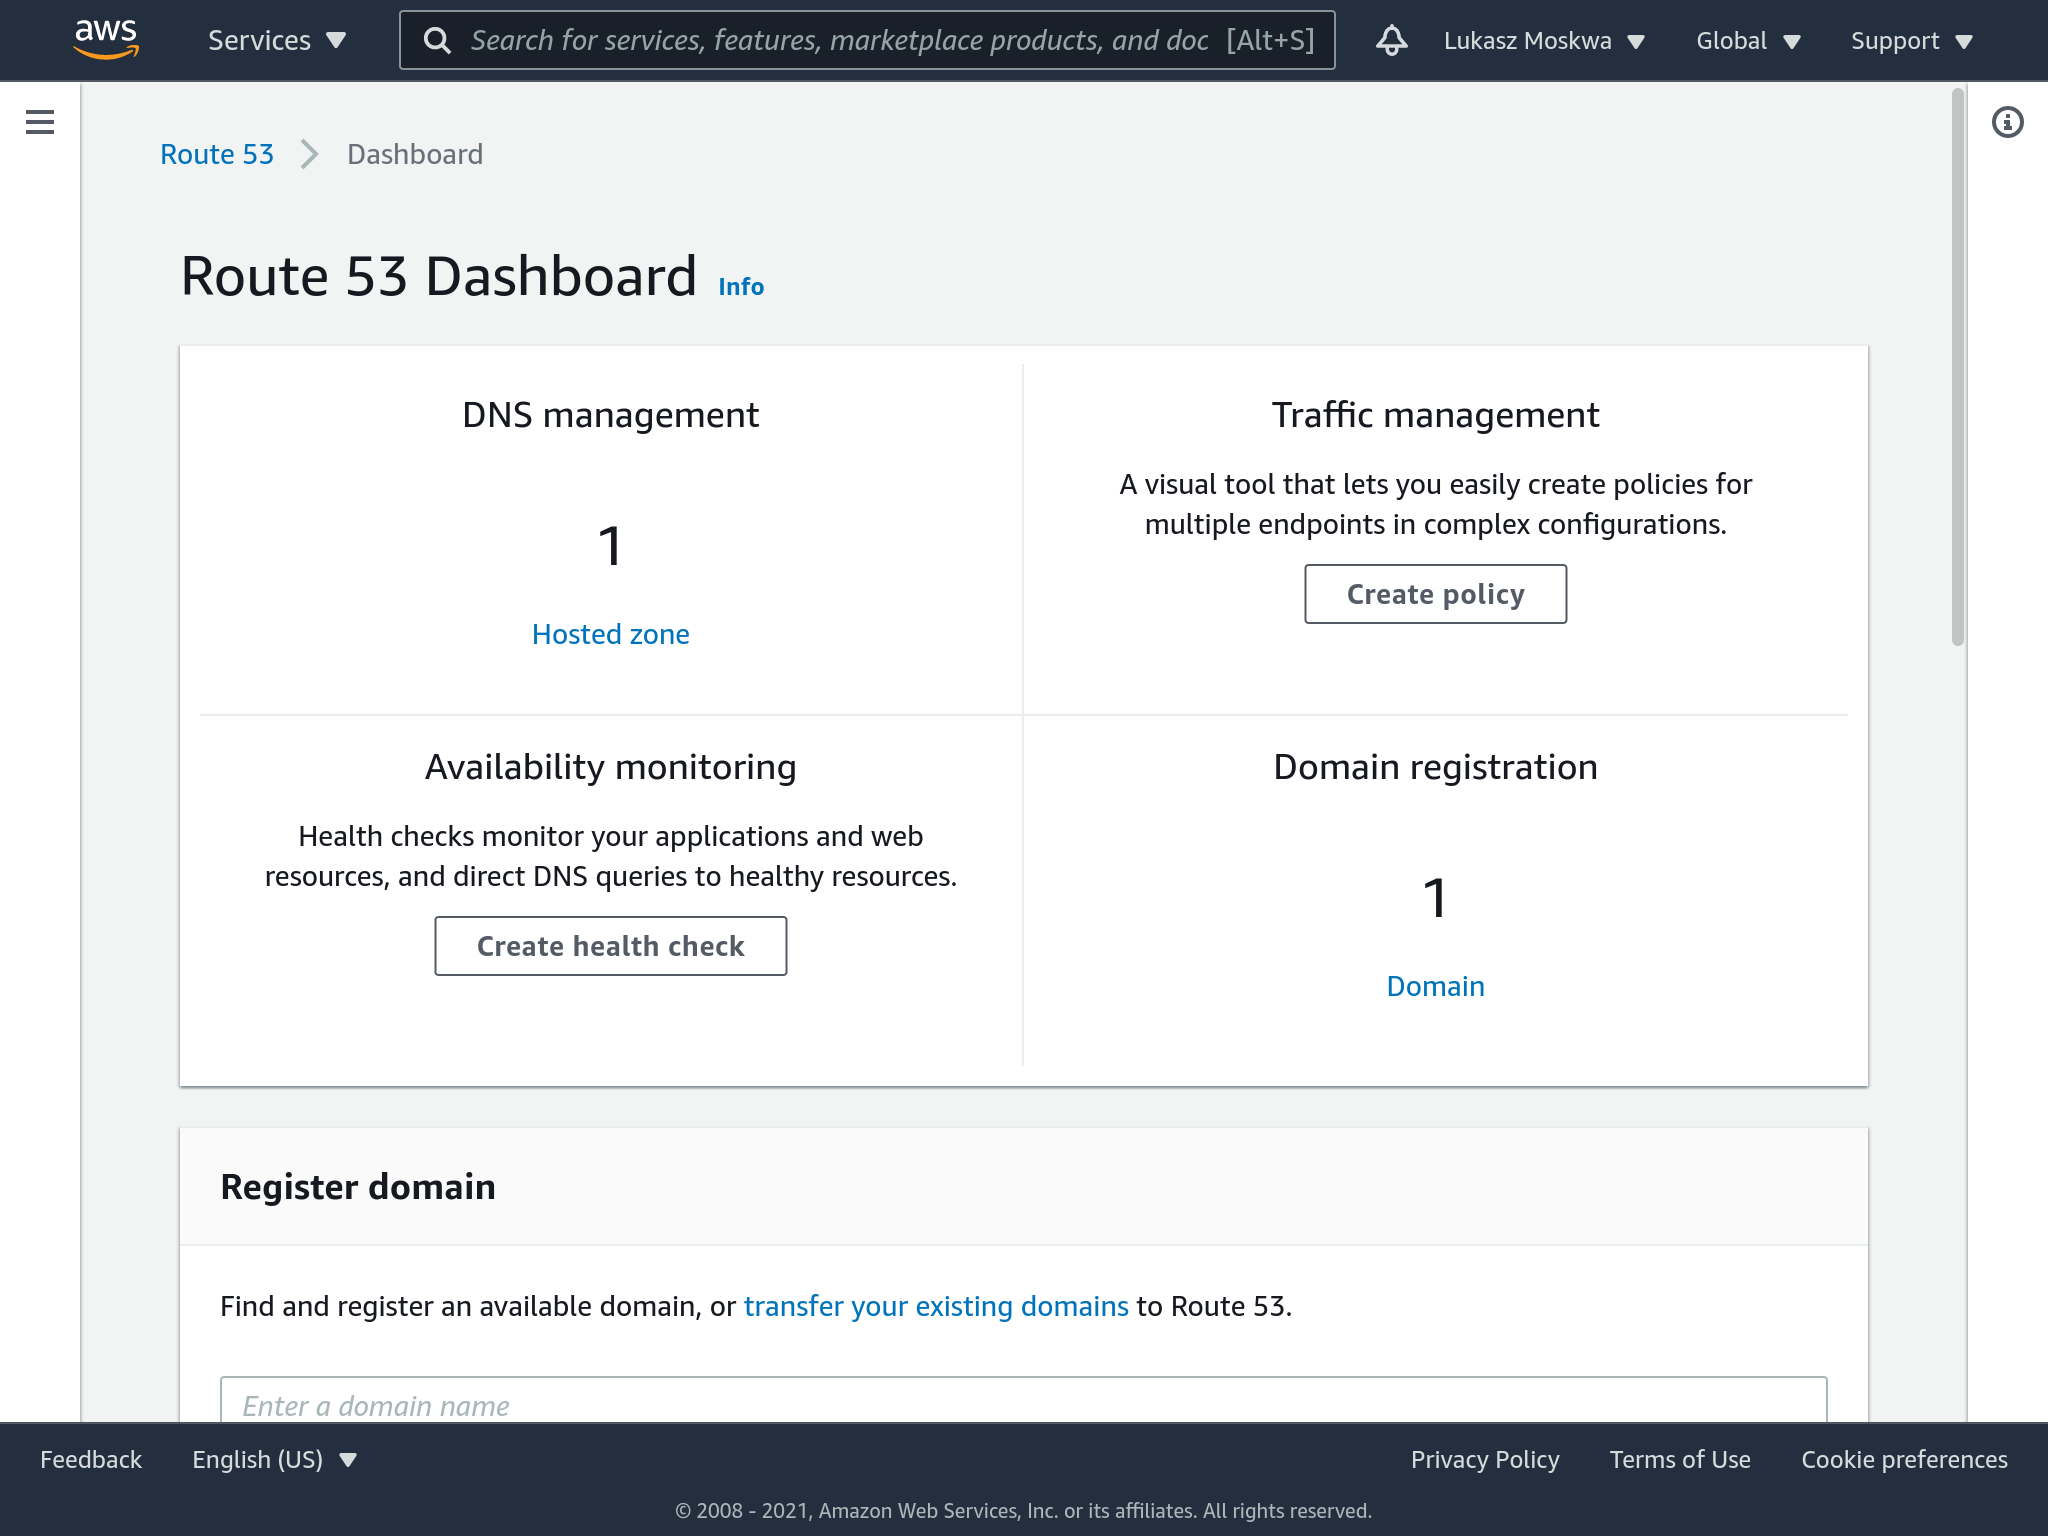
A new “zone” associated with our domain has been created for us. Zones are an AWS specific concept, not normally found in other DNS configurations. Within this zone we need to go and define records for the DNS. These records are nothing more than a set of rules that are used by DNS to figure out how to route the traffic it receives on that domain.
So to start, let’s create an A record, which is a simple routing for IPv4.
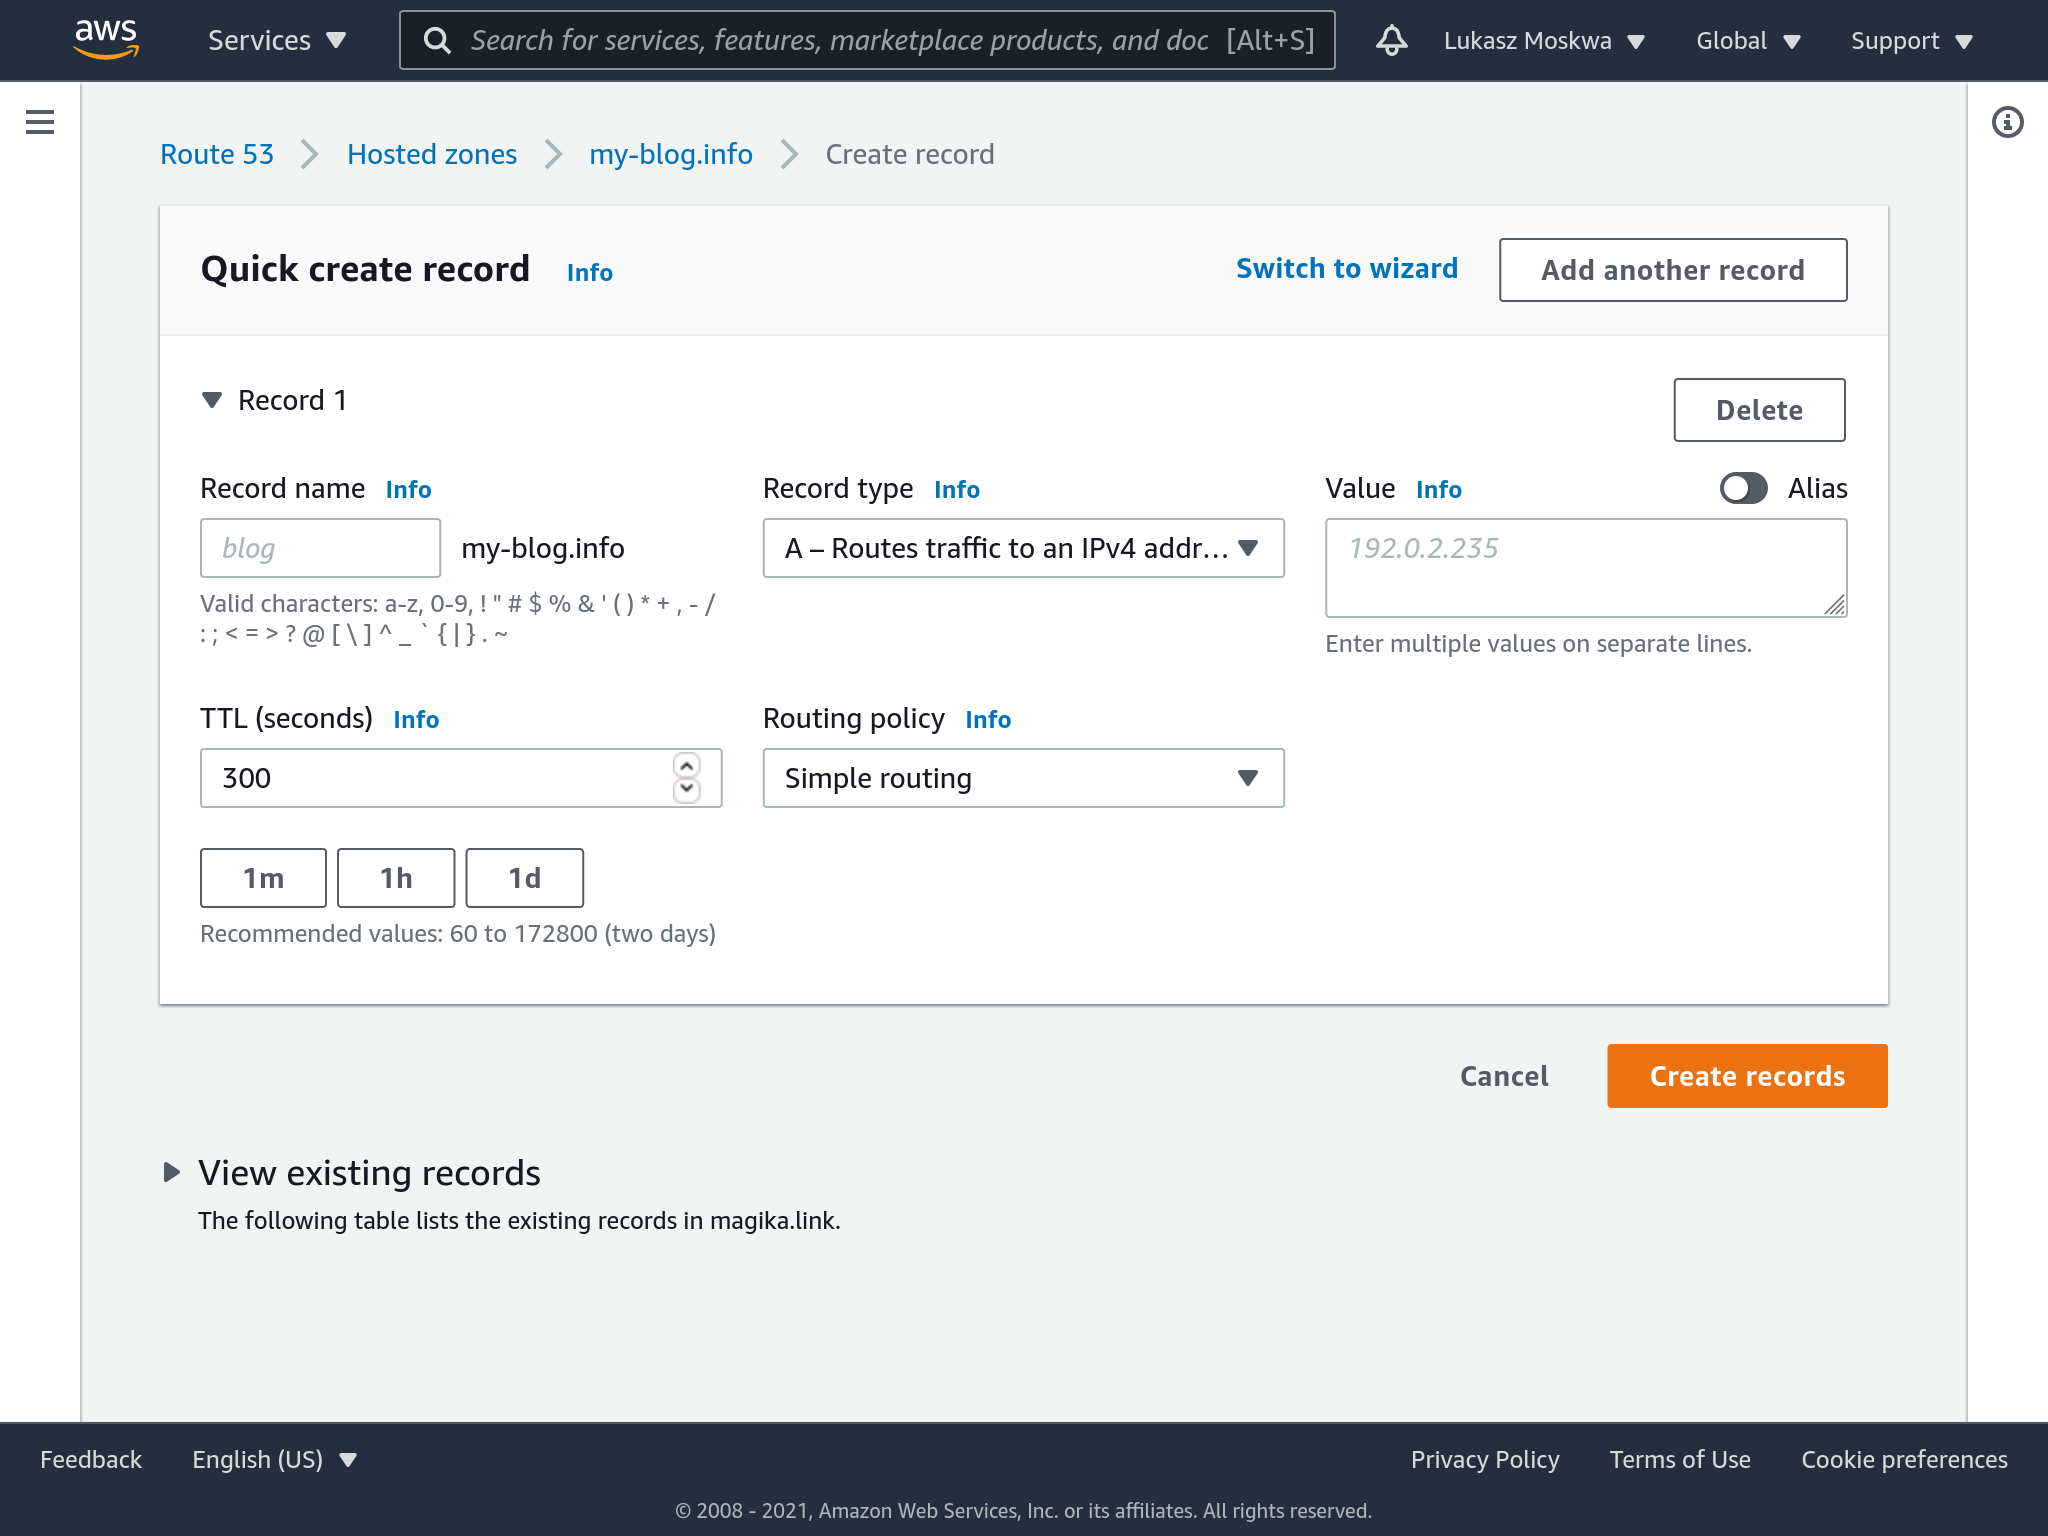
To put it on our bucket, we select alias and the S3 bucket to which we want to send our traffic.
Once we press save, in a short time it will be possible to visit our blog on s3 through the new domain we selected.
Note: it is recommended to create also another record, apparently identical, which is AAAA. This is used for routing traffic via IPv6.
Eew.. no HTTPS?
Well… no. Our newly registered domain in this way does not also have an associated SSL certificate. That’s because we didn’t request it and therefore wouldn’t know where to get it either.
For certificates, there is a service from AWS called Amazon Certificate Manager (ACM for short).
So we want to request a certificate for our domain, so we can show the green security badge next to our blog url.
Before doing so, an important note: due to a reason that is still not very clear to me, it is necessary to change region and move to us-east-1 to request your certificate, otherwise it will not be visible from CloudFront.

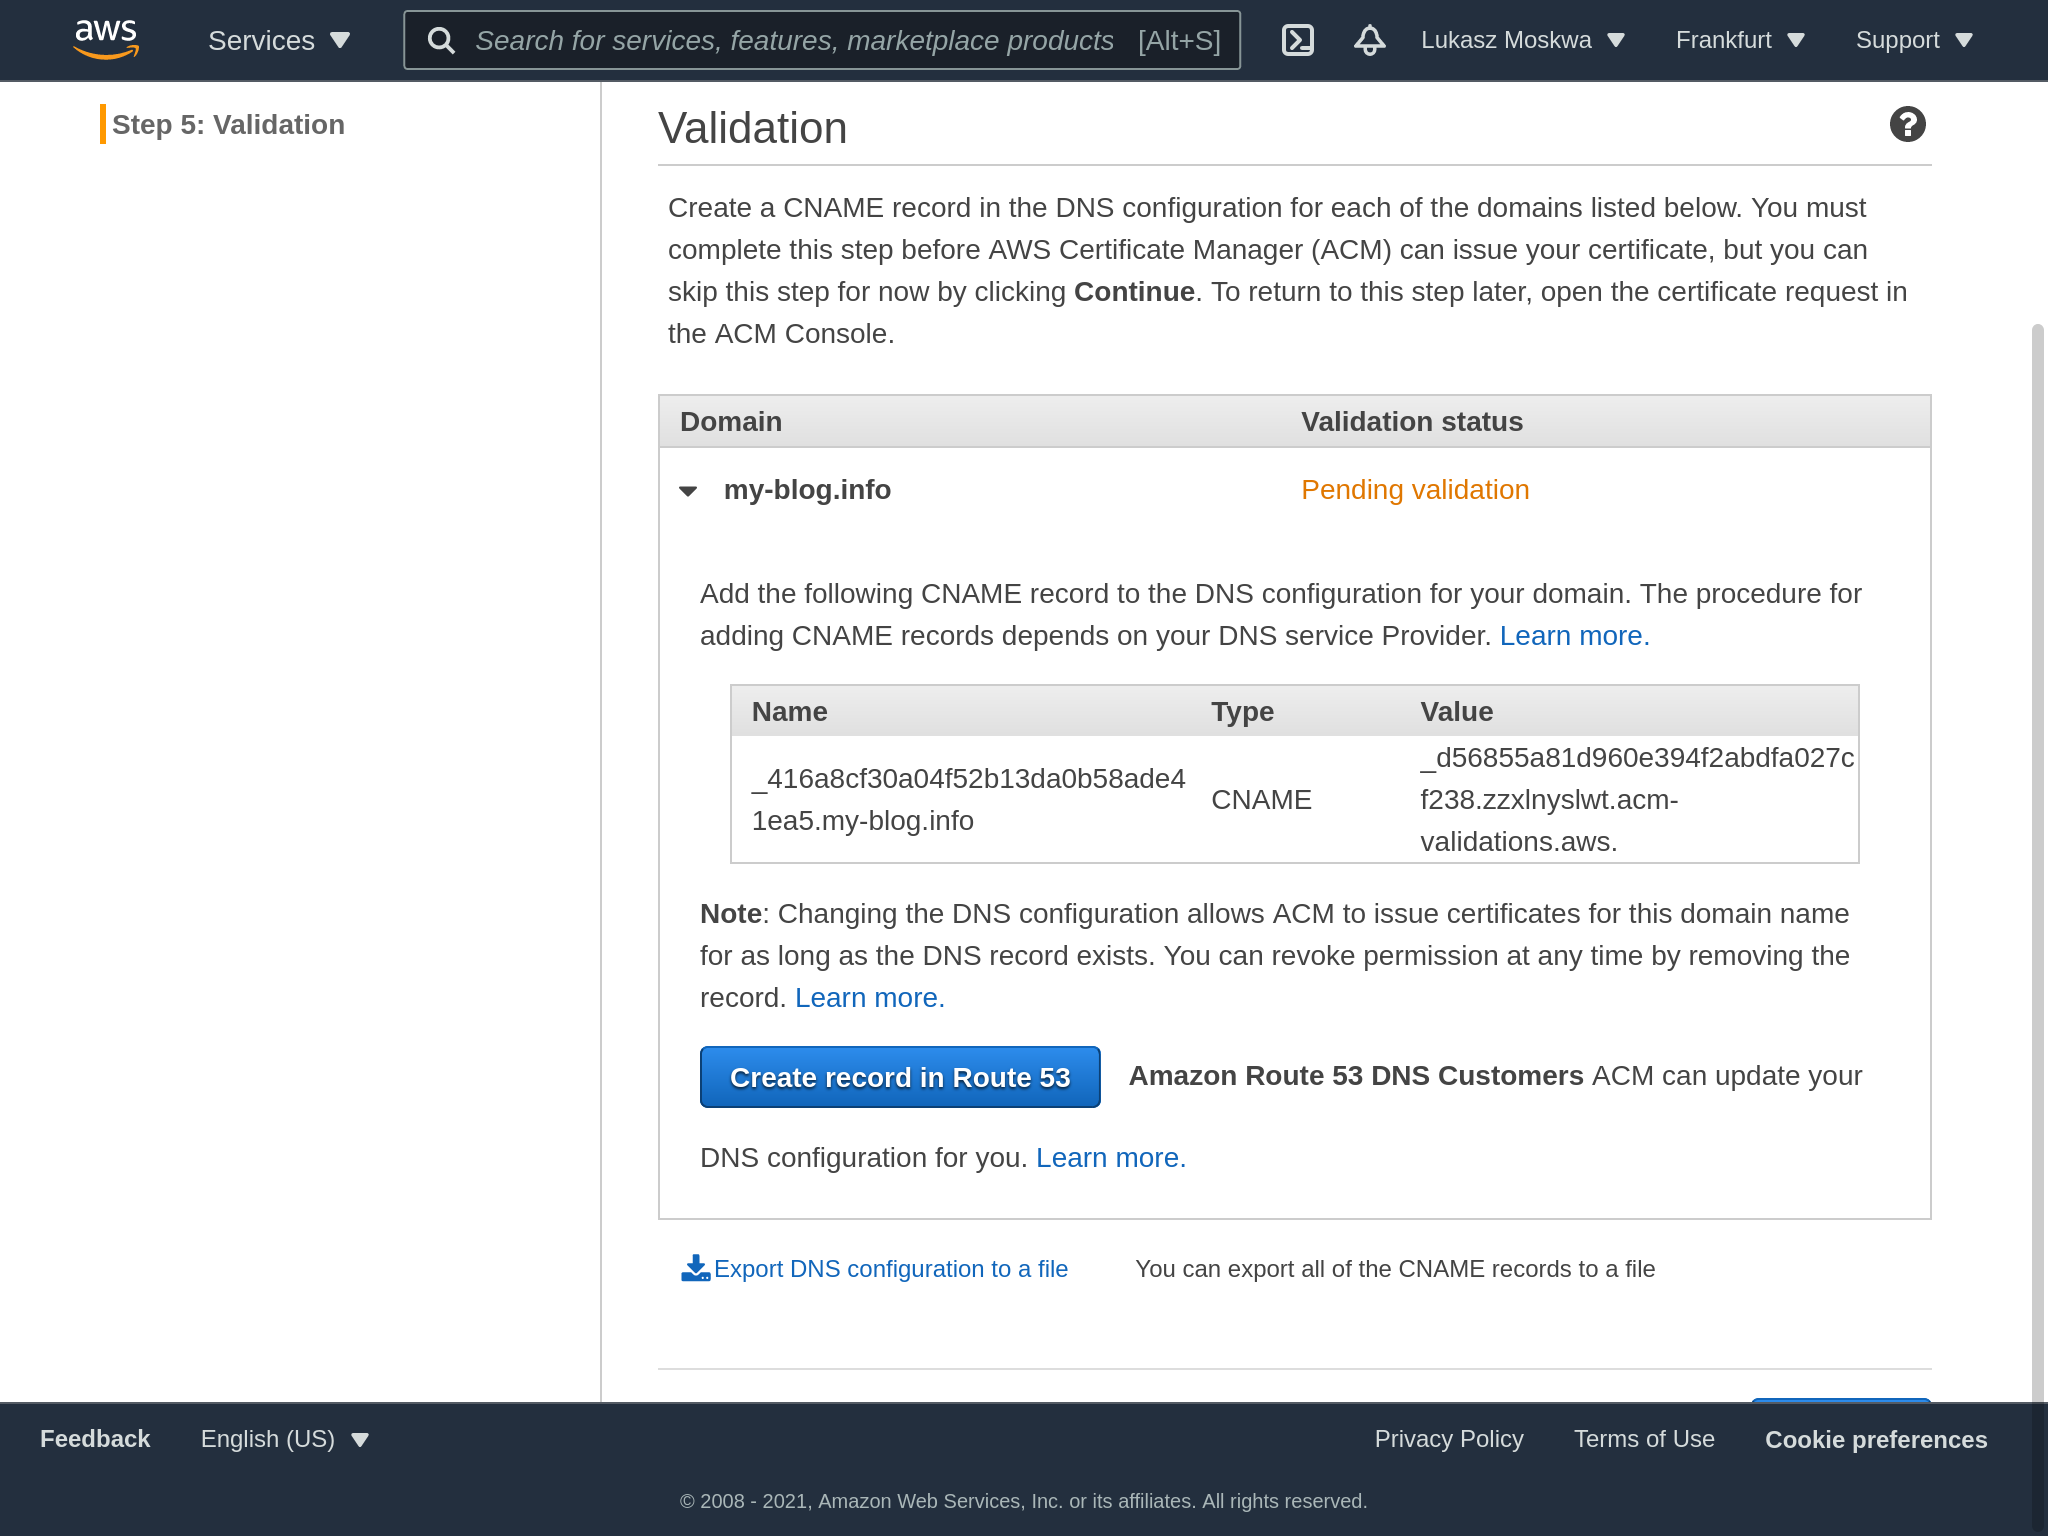
In the process of applying for the certificate, we will also be asked to prove that we actually have ownership of the domain for which we are applying. For those familiar with LetsEncrypt, this process is no different than the ACME challenge.
However, AWS has a handy feature that allows you to automatically add records to route 53 in order to prove the legitimacy of our request.
Now it’s time to move to CloudFront.
Cloudfront distribution
CloudFront is an AWS service that allows you to more efficiently distribute content by storing a copy in on edge locations. This makes delivery faster.
Since our content needs to be available even in the most remote regions of the planet, we create a CloudFront distribution that will act as a “cache” for our pages.
…actually we only do this because this is the only way we can use an SSL certificate between Route 53 and our bucket inside S3. I’m not too much of a fan of this necessary choice. Personally, I would have preferred that among S3’s static hosting options there was also a way to select an ACM certificate or upload your own to then assign to the bucket, avoiding using yet another service, but okay.
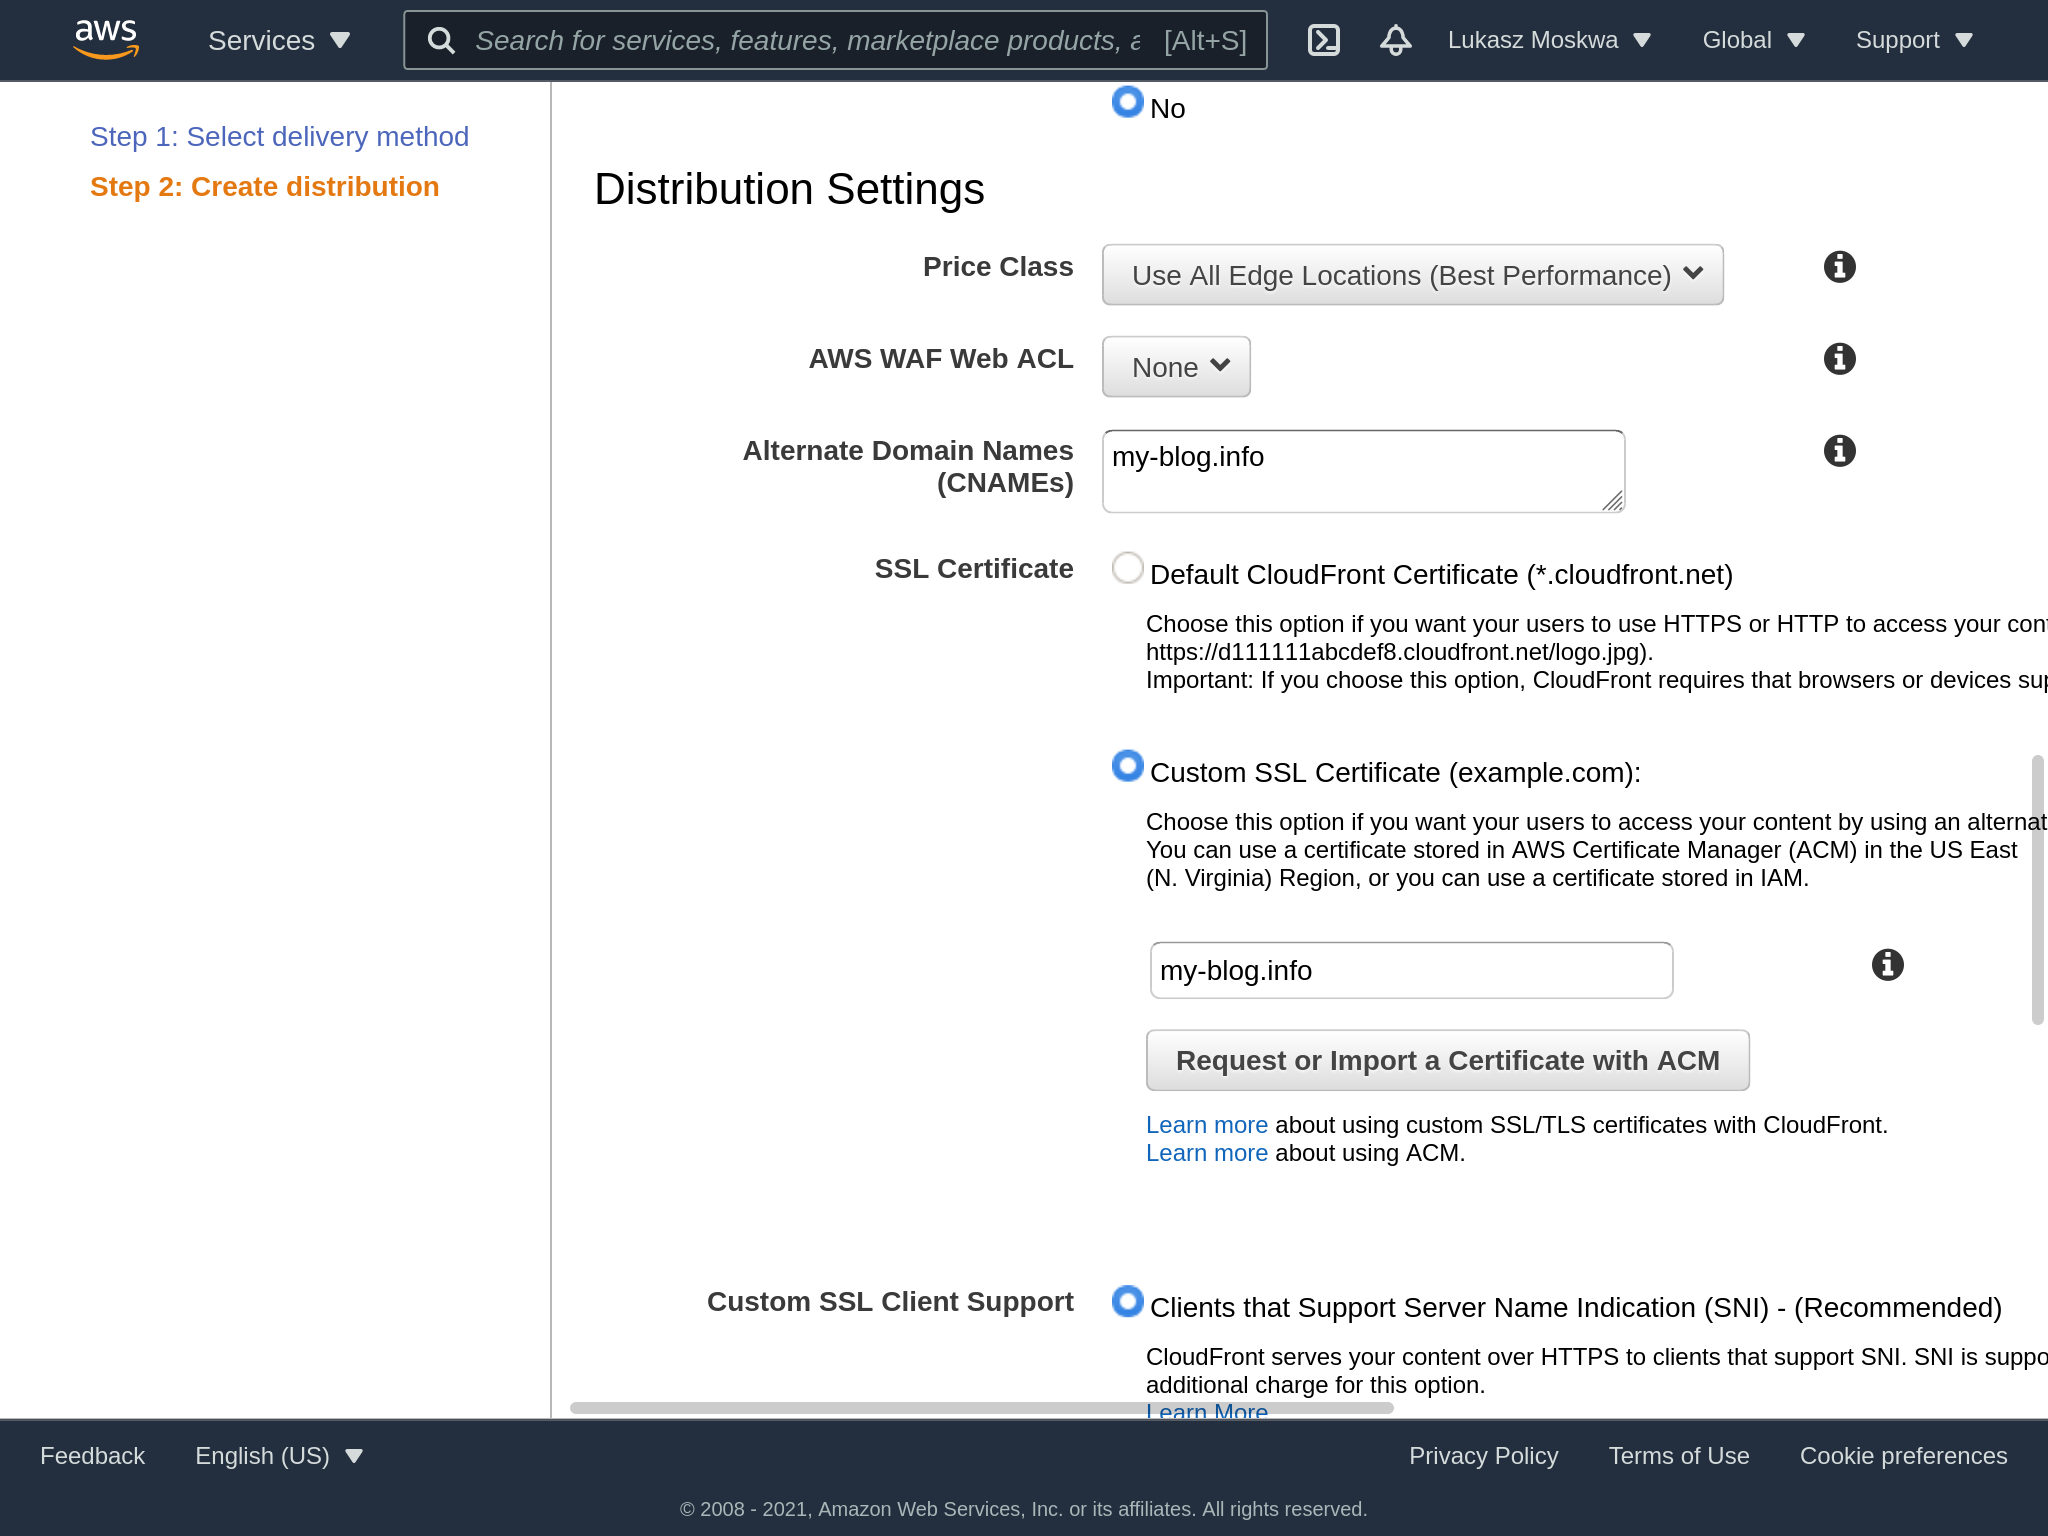
Creating a CloudFront distribution has several aspects to consider, and initially it may seem less straightforward than it is. The distribution must first know what to distribute, via the origin parameter. Among the settings then we find other fields like in the picture, which allow us to select the behavior we want for our requests.
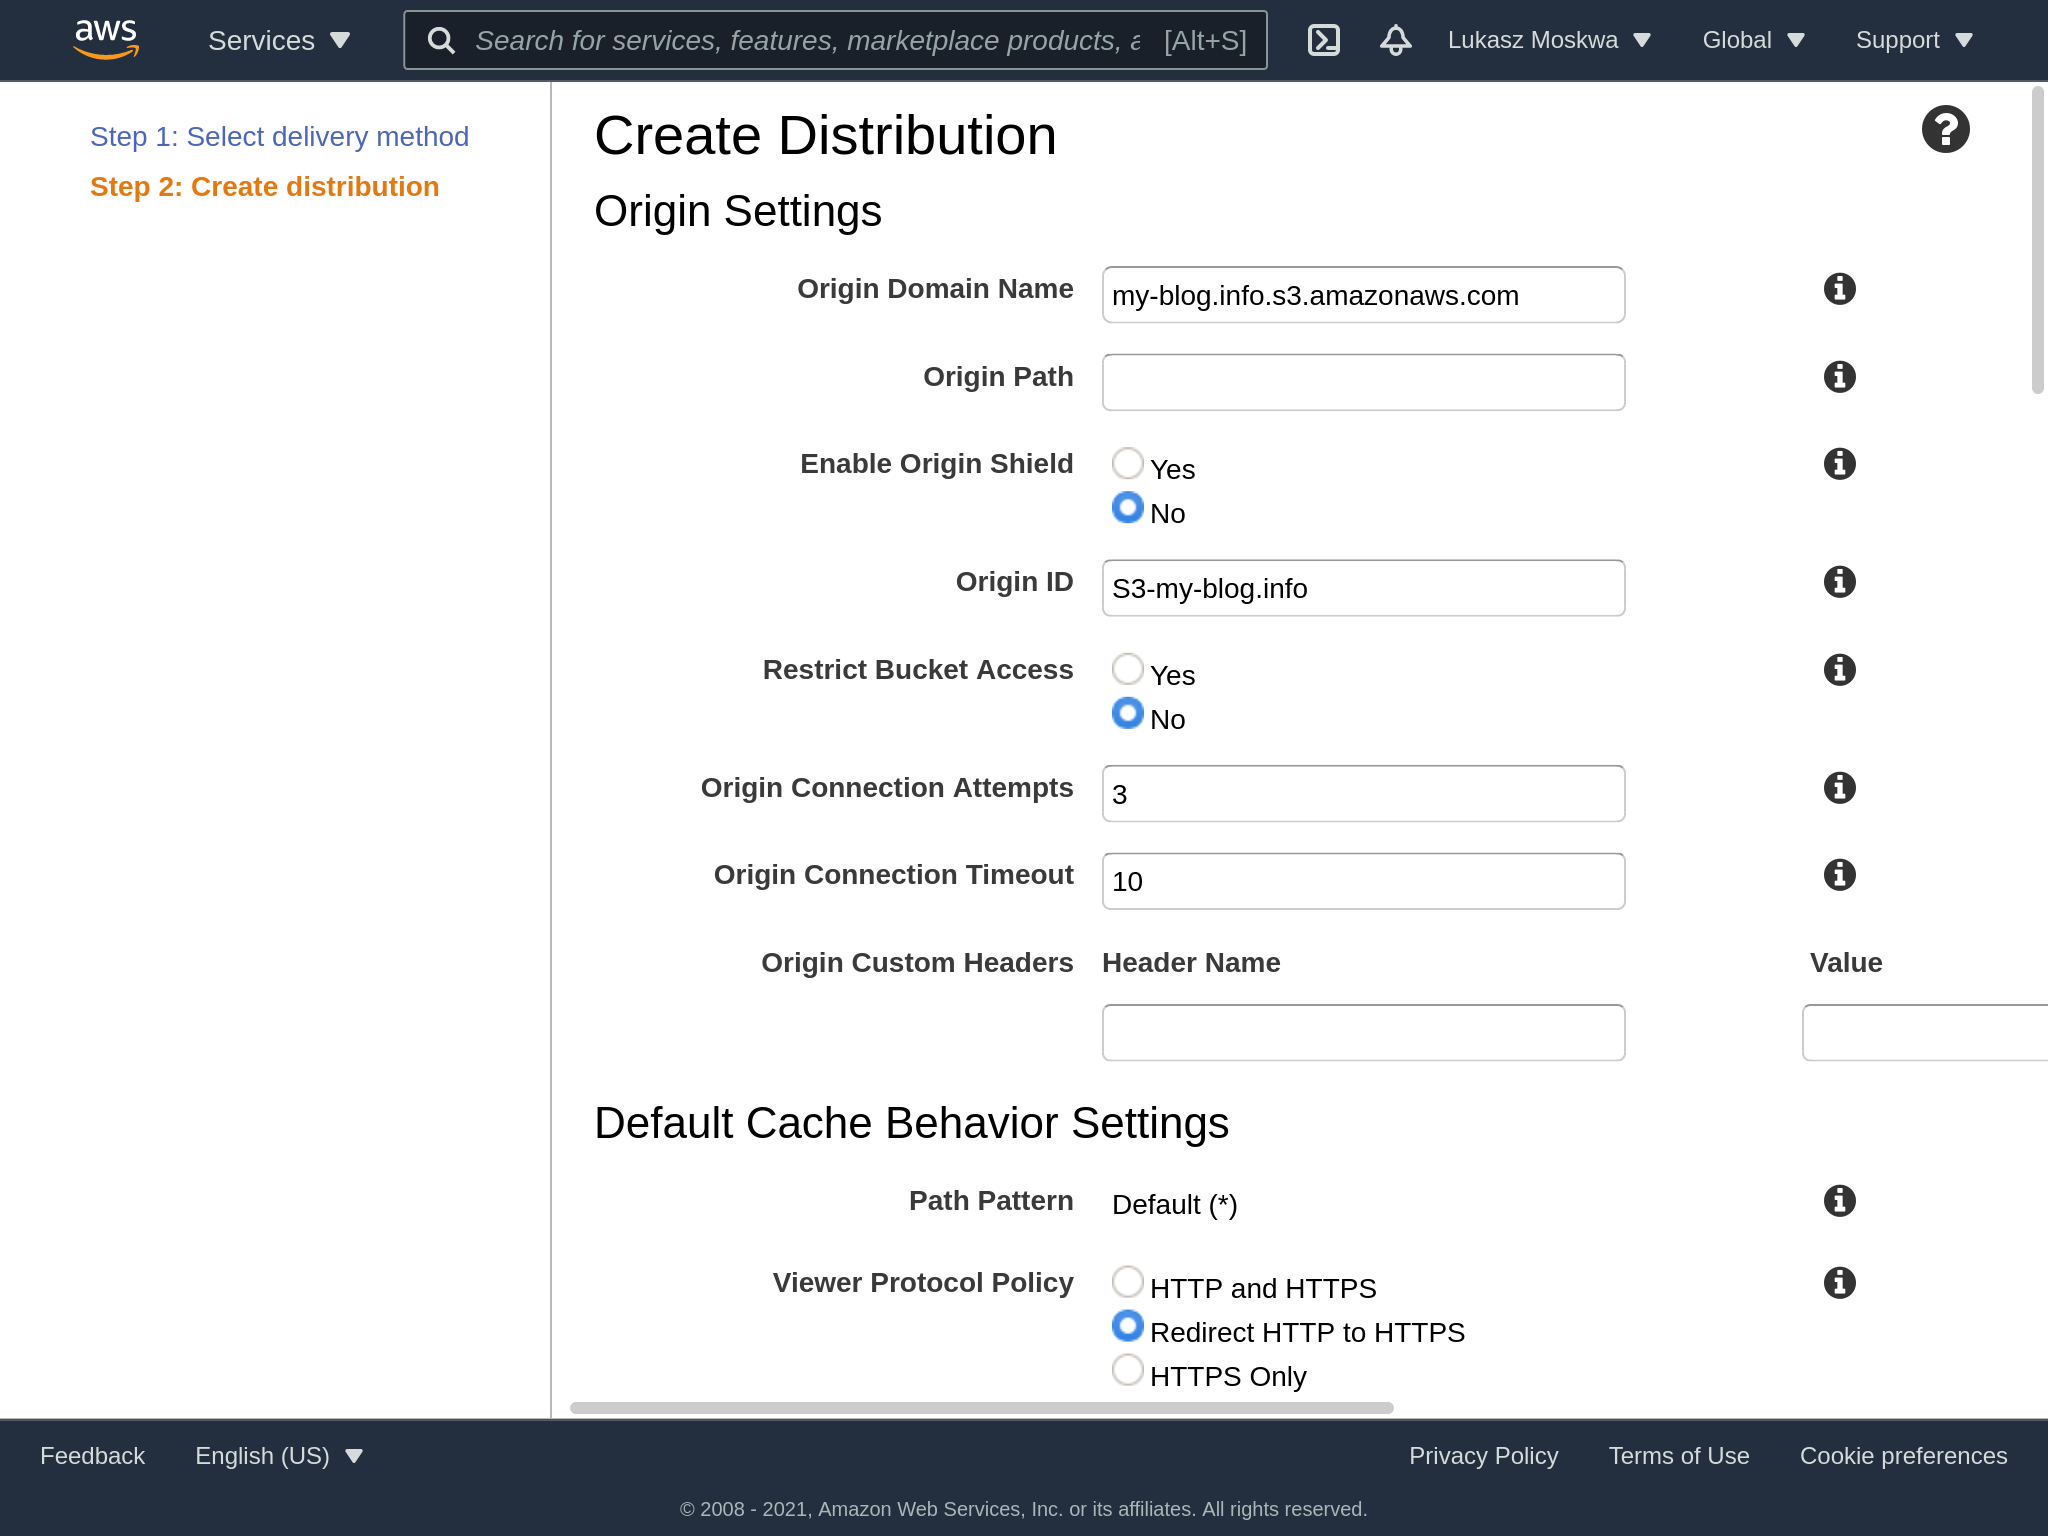
At this point we can also select our previously created certificate. If for some reason it does not show up, check that the certificate was requested in us-east-1 as a region.
It’s important to note that we also need to enter the various CNAMEs that we want this deployment to then be called with. Specifically, we only want the domain that we requested, so we’ll just enter that.
At this point we proceed with the creation of the distribution, which can take up to 20 minutes.
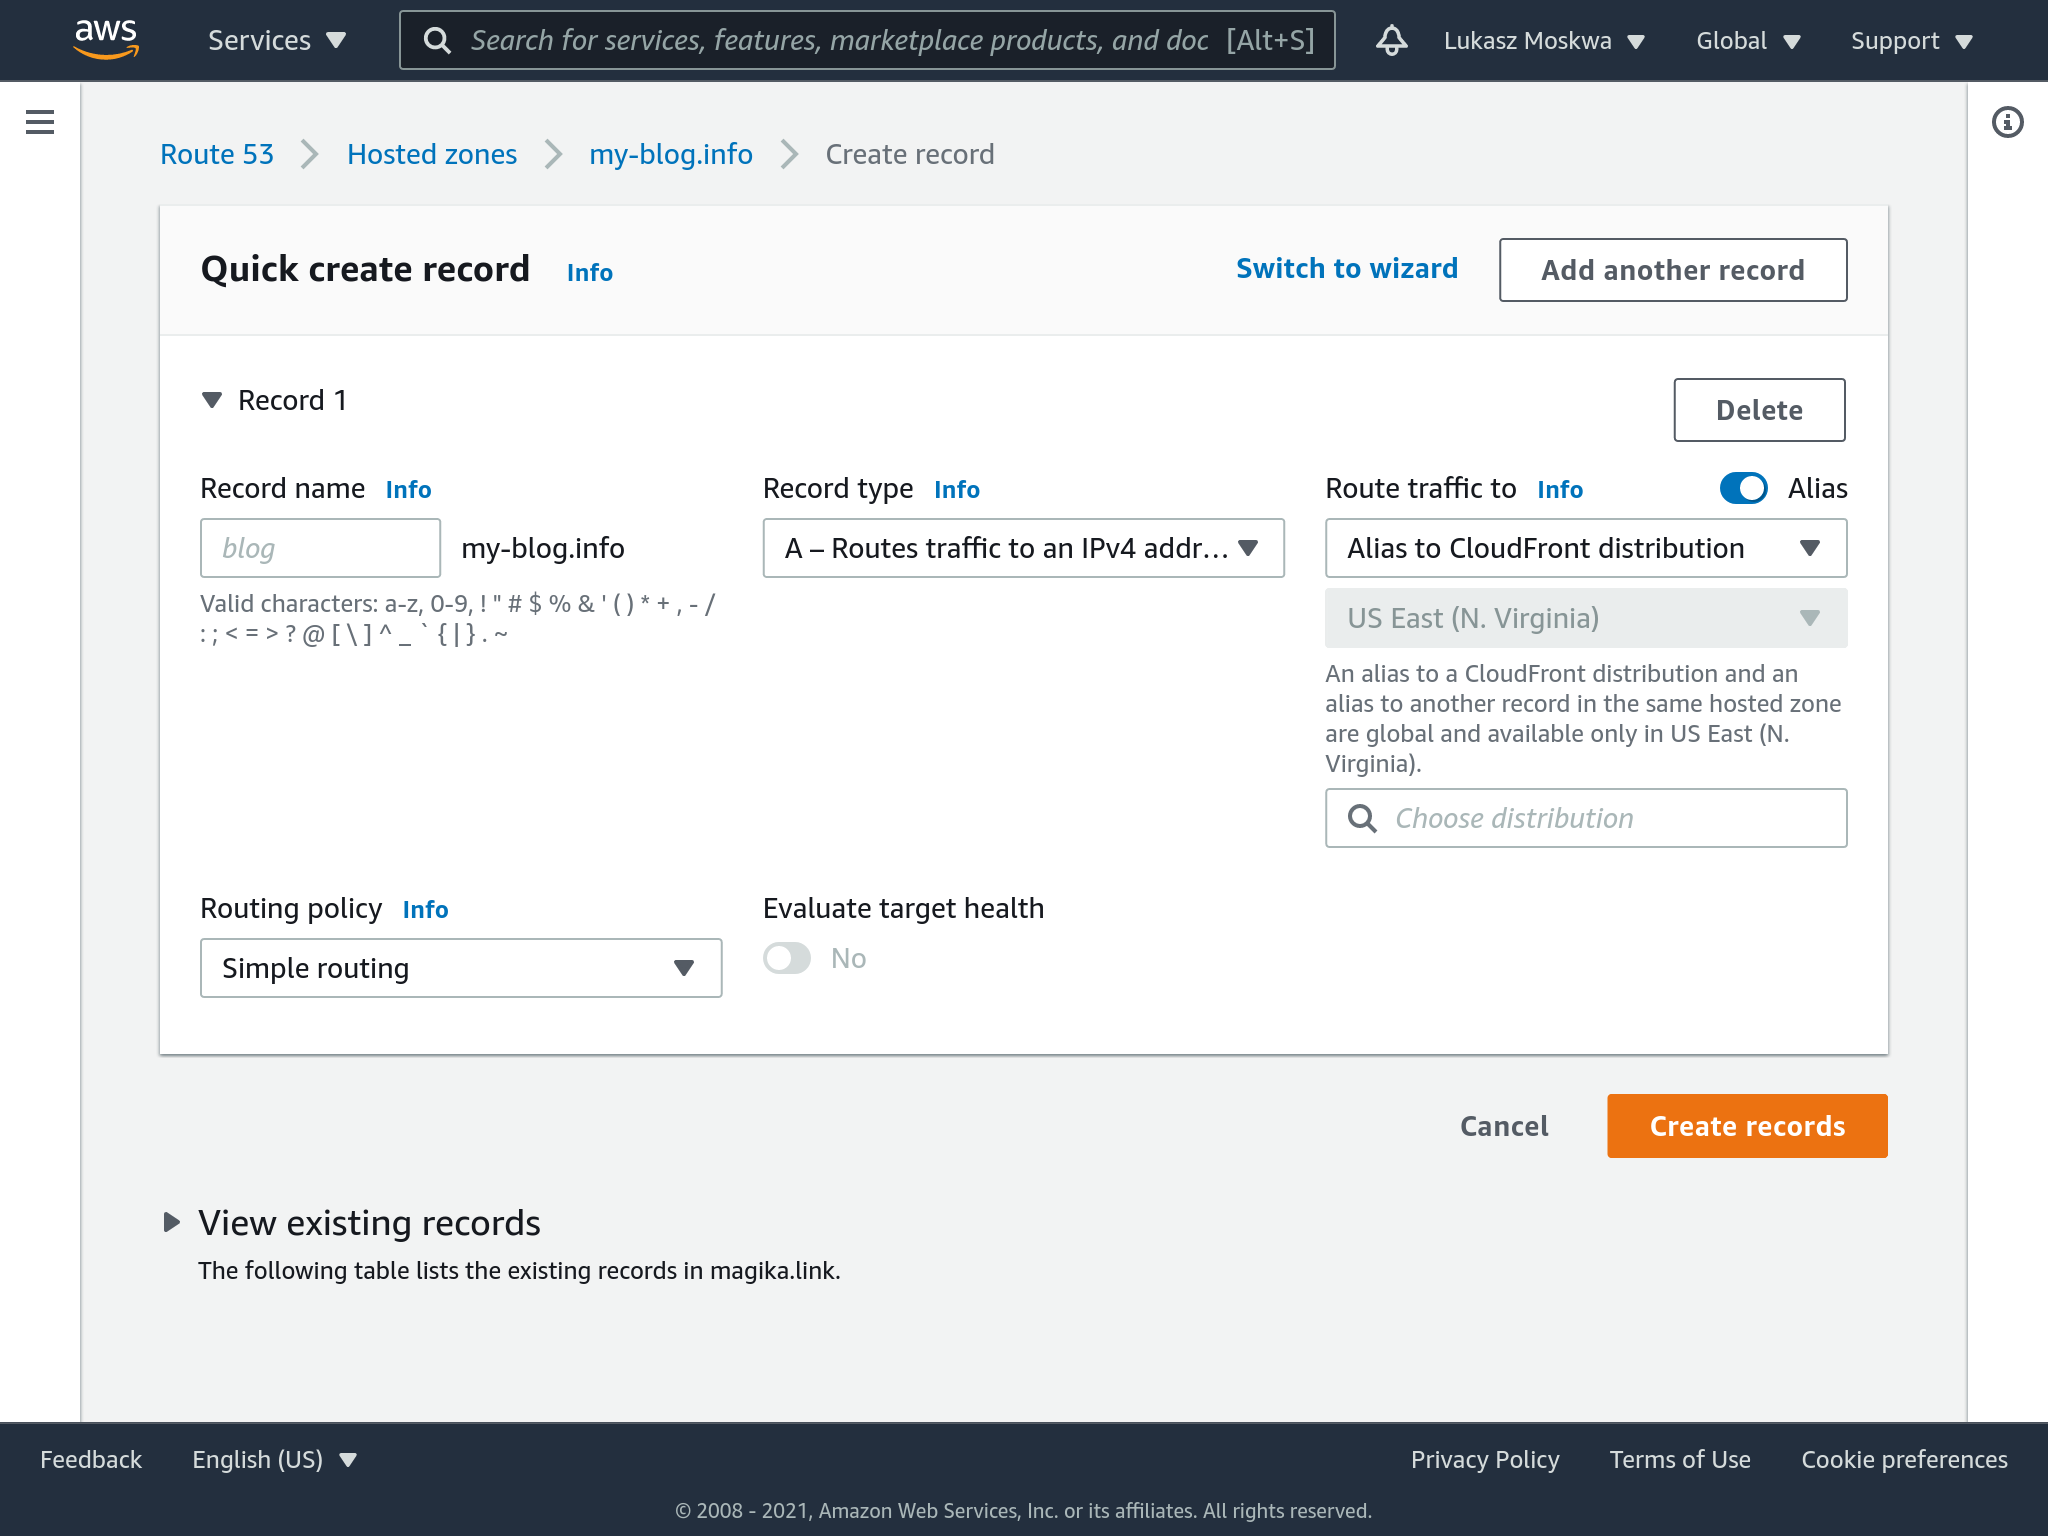
Re-route
At this point we simply need to tell Route 53 to change its routing: it should no longer point towards the S3 bucket but towards the CloudFron distribution.
Conclusion
This is the schema of the AWS services we used in order to achieve our goal:
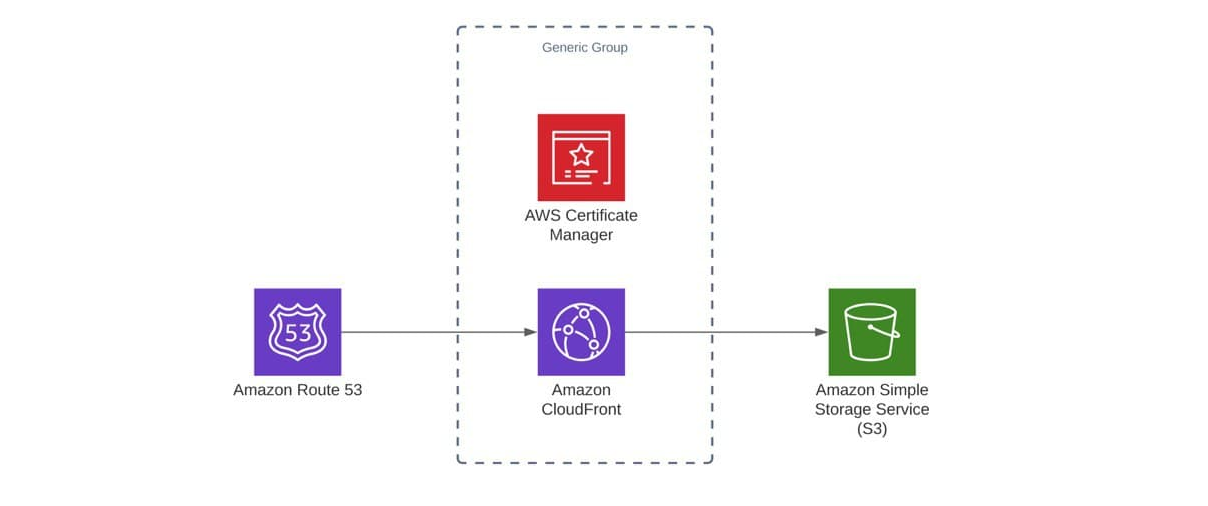
Ultimately, although there are a few more steps then expected to go through in order to get things done, it’s relatively easy to set up a static site with a custom domain and SSL on AWS. Compared to traditional solutions, it’s less expensive as you only pay for requests that are actually made compared to paying for a server instance that runs 24/7 but it is not always used.
comments powered by Disqus